Auto-login is a great feature for those working on a personal PC. If, only you have access to a PC and using it in a protected environment with no unauthorized access, you can activate the auto-login feature. However, if you use the PC in a work environment where others can easily access it, we recommend keeping your user account password-protected.
However, on a password-protected PC, you must provide the credentials to log in every time you access your system. This appears as a hurdle when you need to access your PC urgently. So after ensuring appropriate safety protocols, you can still activate the Auto Login feature on any PC, whether personal or work. Here are the quick steps to enable auto login on your Windows 11 PC.
4 Steps total
Step 1: Enable Auto Login from Windows settings
You can easily access the Windows settings and change the Sign-in options to enable auto-login on Windows 11.
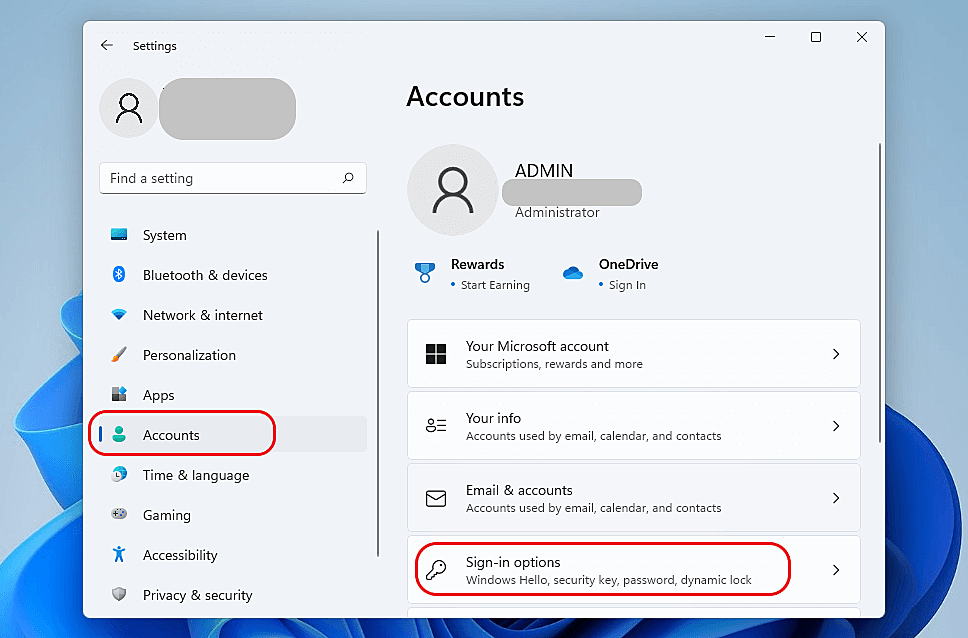
- Click Start and select Settings from the menu.
- Click the Accounts tab in the left pane and select Sign-in Options from the list in the right section.
- Under the Additional Settings section, disable the For improved security, only allow Windows Hello sign-in for Microsoft Accounts on this device (Recommended) option.
- Enter your Admin Password and click Yes.
- Open the Run utility (Windows + R), type netplwiz, and hit Enter.
- Uncheck the box in front of Users must enter a username and password to use this computer option and click OK.
- Click Apply and enter the password to apply the changes.
Step 2: Enable Auto Login with Computer Management
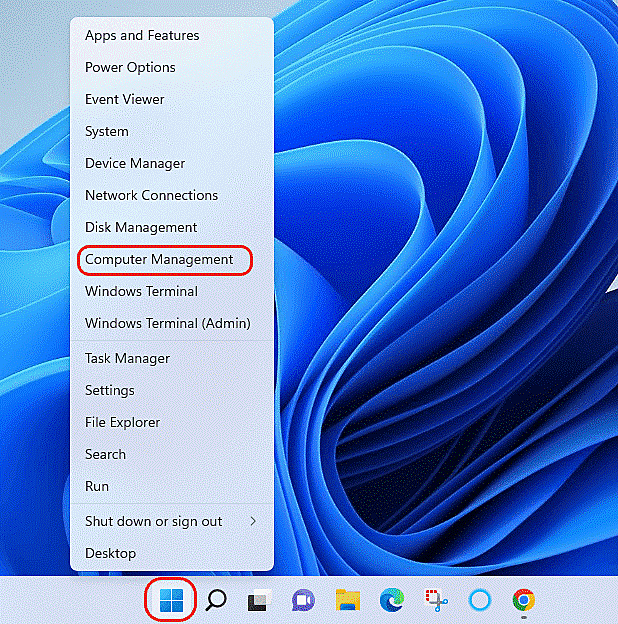
Another method to enable auto-login on Windows 11 is using the Computer Management utility. Here is how to do it.
- Click Start and select Computer Management from the list.
- Select the Local users and groups tab in the left pane and click Users from the expanded list.
- Right-click the user profile for which you need to enable auto-login on Windows 11 and select Set Password … from the right-click menu.
- Click Proceed in the warning box and click OK without entering any password in the Set Password window.
- Restart your PC for the changes to take effect.
Caution: The above method might cause data loss. However, you can recover your data using free data recovery software.
Step 3: Use Windows Registry to enable auto login on Windows 11
Windows Registry contains sensitive data related to your Windows 11 OS. Therefore, you must tread with caution while using it. Altering any wrong attribute might result in serious troubles. So, you should follow the instructions below strictly.
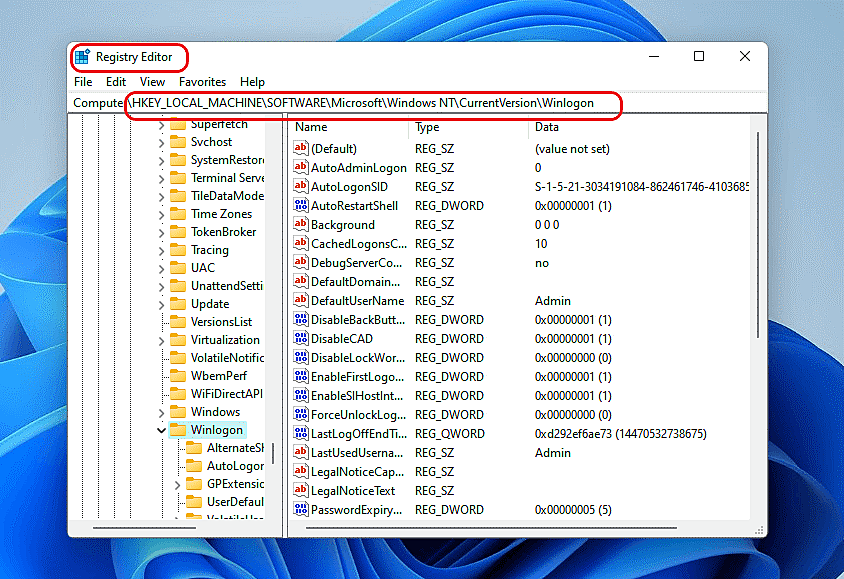
- Type regedit in the Run utility and press Enter.
- Insert the path HKEY_LOCAL_MACHINE\SOFTWARE\Microsoft\Windows NT\CurrentVersion\Winlogon in the address bar on top and press Enter.
- Right-click the Winlogon folder in the left pane and select New > DWORD (32 Bit) value.
- Name the New Value in the right pane as AutoAdminLogon. Then, double-click it and select the value as 1.
- Right-click the Winlogon folder and select New > String Value. Enter DefaultUserName as the name of a new string value.
- Double-click on DefaultUserName. Type your User Name under the Value Data tab and click OK.
- Right-click the Winlogon folder again and select New > String Value.
- Name the value as DefaultPassword. Enter your password under the Value Data tab and click OK.
Step 4: Use Autologon to enable auto login
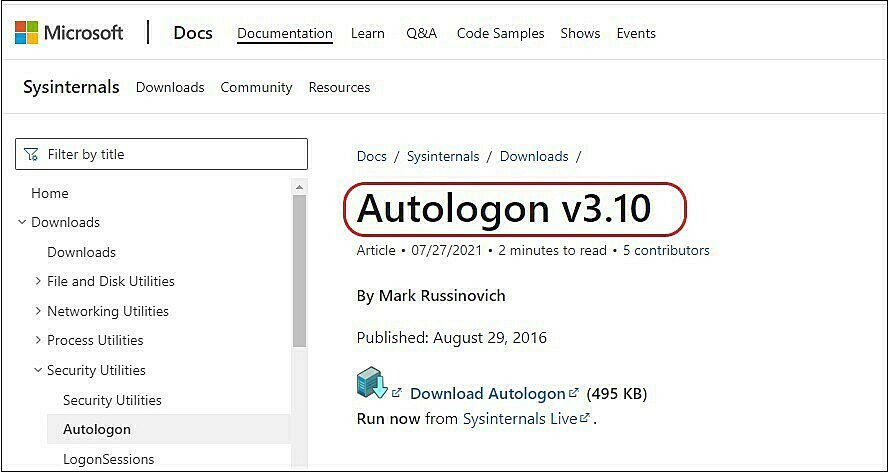
Autologon is a Windows tool available on Microsoft’s official site. It enables you to configure the built-in auto-login mechanism easily. You can use it to enable the auto login feature on your Windows 11 PC.
- Install the Autologon tool on your PC and launch it.
- You’ll be asked to enter your password. Provide the password and click Yes.
- Enter your password again in the new window and click Enable.
- You’ll see a message Autologon successfully configured. Click OK.
- Restart your PC to execute the changes.
Enabling auto-login on your PC can not only save your time but also allow easy access. But most importantly, none of the above methods causes any permanent change to your login option as you can reverse it at any time, depending on the situation. You must understand that protecting your PC with a password is a necessary step toward data security. If you’re using a shared PC, it is better to secure your user profile with a strong password.
However, entering the password each time you log in is an unnecessary and tiresome job on a personal system with access to no one but you. Therefore, you can use the above methods to enable auto login on Windows 11.
